
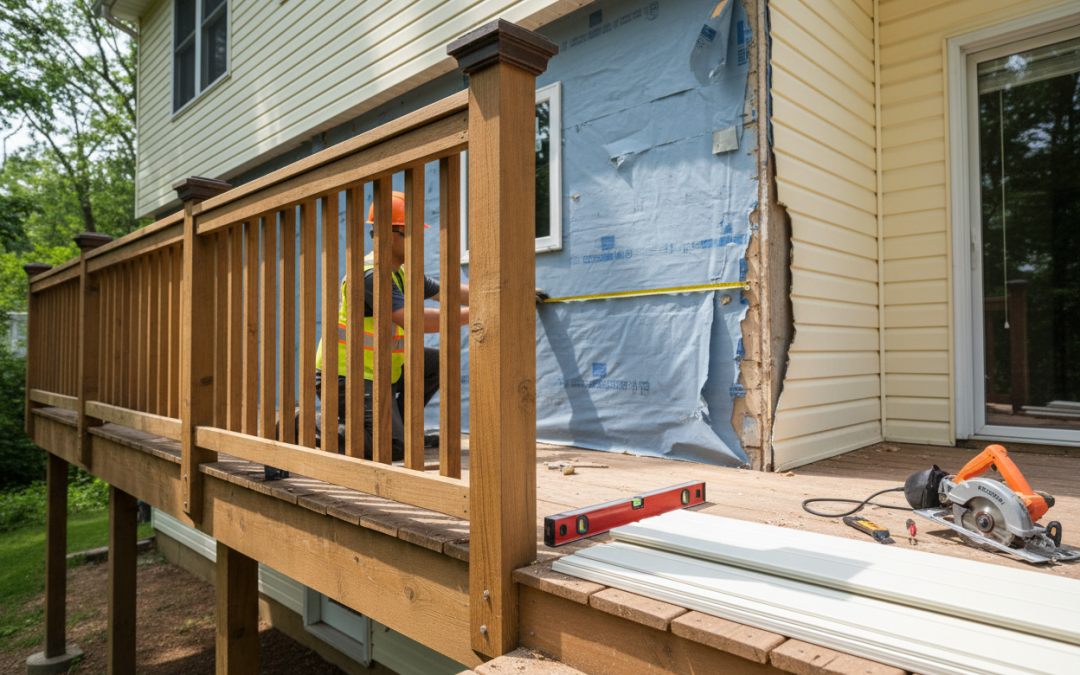
Siding Replacement: Working Around Existing Deck Attachments
When it’s time to replace your home’s siding, you might find yourself facing a common challenge: how to work around existing deck attachments without compromising the integrity of either structure. This scenario is more frequent than you’d think, and many homeowners feel overwhelmed by the complexity it presents. The good news is that with proper planning and the right approach, you can successfully replace your siding while keeping your beloved deck intact.
Whether you’re dealing with a wraparound deck, multiple levels, or complex attachment points, understanding the intricacies of working around these structures can save you time, money, and considerable headaches. Let’s explore the strategies and considerations that will help you navigate this challenging but entirely manageable project.

Understanding the Challenge of Deck-Attached Siding
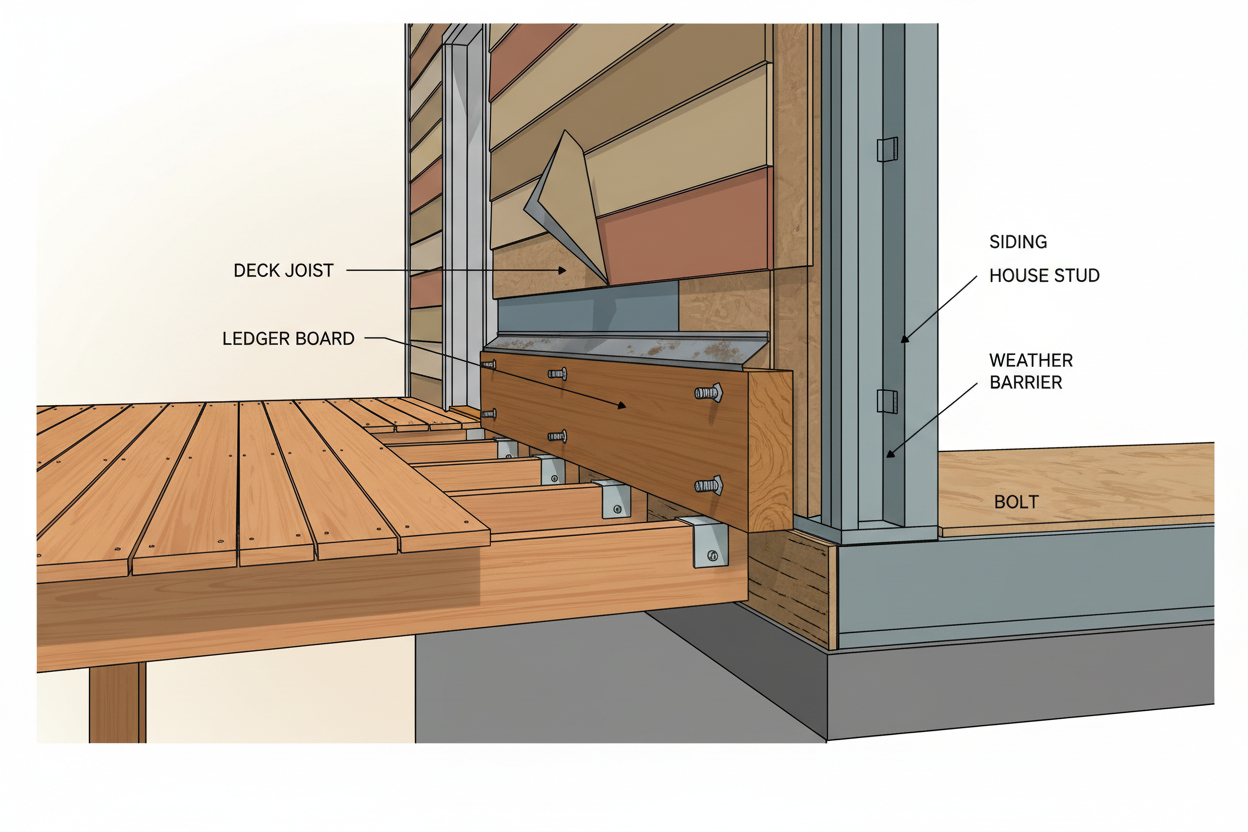
Before diving into solutions, it’s crucial to understand why deck attachments complicate siding replacement projects. Most decks are secured to your home through a ledger board system, which creates a direct connection between the deck structure and your home’s framing. This connection point often sits directly behind or adjacent to your existing siding, creating what professionals call a “critical junction.”
The challenge becomes even more complex when you consider that this junction must remain weatherproof while allowing for the natural expansion and contraction of both materials. Additionally, building codes have evolved significantly over the years, and your replacement project might need to meet current standards that didn’t exist when your deck was originally installed.
Many homeowners discover that their deck attachment points have been compromised over time due to water infiltration, improper flashing, or settling of the structure. This makes the siding replacement project an excellent opportunity to address these underlying issues before they become major problems.
Planning Your Siding Replacement Project
Successful siding replacement around deck attachments starts with thorough planning. Begin by carefully documenting your current setup with photographs from multiple angles. Pay special attention to how the existing siding meets the deck, noting any flashing details, trim work, or unique attachment methods.
Next, consider whether this is the right time to address any deck maintenance or upgrades. Since you’ll have access to areas that are typically hidden, it might be cost-effective to handle both projects simultaneously. This could include reinforcing attachment points, upgrading hardware, or improving drainage systems.
Don’t forget to check with your local building department about permit requirements. While siding replacement might seem straightforward, working around structural attachments often requires permits and inspections to ensure everything meets current codes.
Essential Tools and Materials for the Job
Working around deck attachments requires some specialized tools beyond your standard siding installation kit. You’ll need precision cutting tools like a multi-tool or reciprocating saw for tight spaces, various sizes of pry bars for careful removal work, and possibly a right-angle drill for accessing cramped areas.
Material-wise, you’ll want to have extra flashing on hand, as deck attachment points typically require custom flashing solutions. Step flashing, continuous flashing, and flexible membrane materials will likely all play a role in your project. Quality exterior-grade sealants and weatherproofing compounds are also essential for creating lasting, weather-tight seals.
Consider investing in or renting some scaffolding or adjustable platforms. Working around deck attachments often means accessing awkward angles and heights, and having stable, safe working platforms makes the job much more manageable and safer.
Step-by-Step Removal Process
The removal process requires patience and methodical work. Start by carefully removing trim pieces and any decorative elements around the deck attachment area. These pieces often hide important details about how everything connects, and you’ll want to preserve them if possible for reinstallation.
When removing siding panels near deck attachments, work slowly and use gentle prying techniques. The goal is to understand how everything was originally installed so you can replicate or improve upon those methods. Take plenty of photos as you go, documenting each layer and connection point.
Pay special attention to any existing flashing or weatherproofing measures. Even if they appear to be failing, understanding the original installer’s intent can guide your improvement efforts. Sometimes what looks like poor workmanship is actually a creative solution to a unique challenge.
Addressing Water Damage and Structural Issues
Once you’ve removed the old siding, you’ll likely discover some water damage or structural issues around the deck attachment points. This is completely normal and expected, especially in older installations. The key is addressing these issues properly before installing new siding.
Minor water damage to sheathing can often be repaired with wood hardener and filler products, but more extensive damage might require partial replacement of sheathing or even framing members. Don’t be tempted to cover up problems with new siding – they’ll only get worse over time and potentially compromise your entire installation.
This is also an excellent time to upgrade your deck’s attachment hardware if needed. Modern deck attachment systems are far superior to older methods, and upgrading now can prevent future problems while ensuring your deck meets current safety standards.
Installing New Siding Around Deck Connections
Installing new siding around deck attachments requires careful attention to detail and often some creative problem-solving. The key is maintaining proper drainage while creating a weather-tight seal that accommodates the natural movement of both structures.
Start with proper flashing installation. This typically involves step flashing where the deck meets the wall, with each piece overlapping the one below it to direct water away from the connection. The flashing should extend well beyond the attachment hardware and be properly sealed to the house wrap or vapor barrier.
When cutting siding to fit around deck attachments, measure twice and cut once. These cuts often need to be precise, and mistakes can be costly. Consider making templates from cardboard or thin plywood for complex shapes before cutting your actual siding material.
Proper Flashing and Weatherproofing Techniques
Effective flashing around deck attachments is both an art and a science. The goal is to create a system that directs water away from the connection while allowing for thermal expansion and contraction of both the deck and siding materials.
Modern flashing techniques often involve multiple layers of protection. A primary flashing layer goes directly over the deck ledger, followed by a secondary layer that integrates with your house wrap system. Finally, finish flashing provides the visible weather seal that integrates with your siding installation.
Don’t overlook the importance of proper sealant application. Use high-quality exterior sealants rated for your climate, and apply them in appropriate weather conditions. Remember that sealants are a maintenance item – they’ll need periodic inspection and renewal to maintain their effectiveness.
Common Mistakes to Avoid
One of the biggest mistakes homeowners make is rushing the flashing installation. Proper flashing takes time to install correctly, but it’s absolutely critical for long-term success. Cutting corners here almost always leads to water damage down the road.
Another common error is failing to account for seasonal movement. Both your deck and siding will expand and contract with temperature changes, and your installation needs to accommodate this movement without creating gaps or putting stress on attachment points.
Many people also underestimate the importance of proper drainage. Water needs a clear path away from the deck attachment area, and your installation should enhance, not impede, this drainage. Poor drainage is often the root cause of premature siding failure around deck attachments.
When to Call Professional Contractors
While many aspects of siding replacement can be DIY projects, working around deck attachments often benefits from professional expertise. If you discover structural issues, need to upgrade attachment hardware, or encounter complex flashing situations, professional help can save you time and prevent costly mistakes.
Professional contractors also have access to specialized tools and materials that might not be readily available to homeowners. They’re also familiar with local building codes and inspection requirements, which can be particularly important when working around structural attachments.
Consider getting professional consultation even if you plan to do most of the work yourself. A few hours of expert advice can help you avoid major pitfalls and ensure your project meets professional standards.
Maintenance Tips for Long-Term Success
Once your siding replacement project is complete, establishing a maintenance routine will help ensure long-term success. Plan to inspect the deck attachment areas at least twice yearly, looking for signs of water infiltration, sealant failure, or movement in the connection points.
Keep gutters and drainage systems clear to prevent water from backing up against your new siding installation. Even the best flashing systems can be overwhelmed by excessive water volume, so proper drainage maintenance is crucial.
Consider applying fresh sealant to critical areas every few years, even if they don’t appear to need it. Preventive maintenance is much less expensive than dealing with water damage after it occurs.
Frequently Asked Questions
Q: Do I need to remove my deck to replace the siding behind it?
A: In most cases, no. With careful planning and the right techniques, you can replace siding around deck attachments without removing the deck. However, very complex installations or those with significant structural issues might benefit from temporary deck removal.
Q: How do I know if my deck attachments meet current building codes?
A: Building codes vary by location and have evolved over time. Contact your local building department or hire a professional inspector to evaluate your deck attachments against current standards. This is especially important for older decks.
Q: What’s the best type of flashing for deck attachments?
A: The best flashing depends on your specific situation, but step flashing combined with a continuous membrane is often the most effective approach. The key is creating multiple layers of protection that work together to direct water away from the connection.
Q: Can I use the same siding material around deck attachments as on the rest of my house?
A: Yes, but you might need to modify installation techniques around the attachments. Some siding materials are more forgiving than others when it comes to cutting and fitting around obstacles.
Q: How long should I expect this type of project to take?
A: The timeline varies greatly depending on the complexity of your deck attachments and the extent of any discovered issues. Plan for the deck attachment areas to take significantly longer than straight wall sections – often 3-4 times longer per square foot.
Q: What should I do if I discover water damage during the project?
A: Address water damage immediately before proceeding with new siding installation. Minor damage can often be repaired, but extensive damage might require professional evaluation and repair. Never cover up water damage with new siding.
Successfully replacing siding around existing deck attachments requires patience, planning, and attention to detail, but it’s entirely achievable with the right approach. By understanding the challenges, using proper techniques, and not rushing the process, you can create a weather-tight installation that will protect your home for years to come. Remember that this project is an investment in your home’s long-term integrity, so taking the time to do it right will pay dividends in the future.




Affordable replacement windows Lowry Crossing Texas





How much does it cost for vinyl replacement windows Sherman Texas

How much does it cost for vinyl replacement windows Allen Texas














Home replacement window companies Kennedale Texas

Home window replacement near me Whitewright Texas






New windows for my home Preston Hollow Dallas Texas


















Balch Springs TX Windows And Siding Replacement







Valley View TX Replacement Siding Installation Services


Lake Dallas TX Estimate For Siding Replacement