
The Complete Guide to Vinyl Siding Ventilation Systems
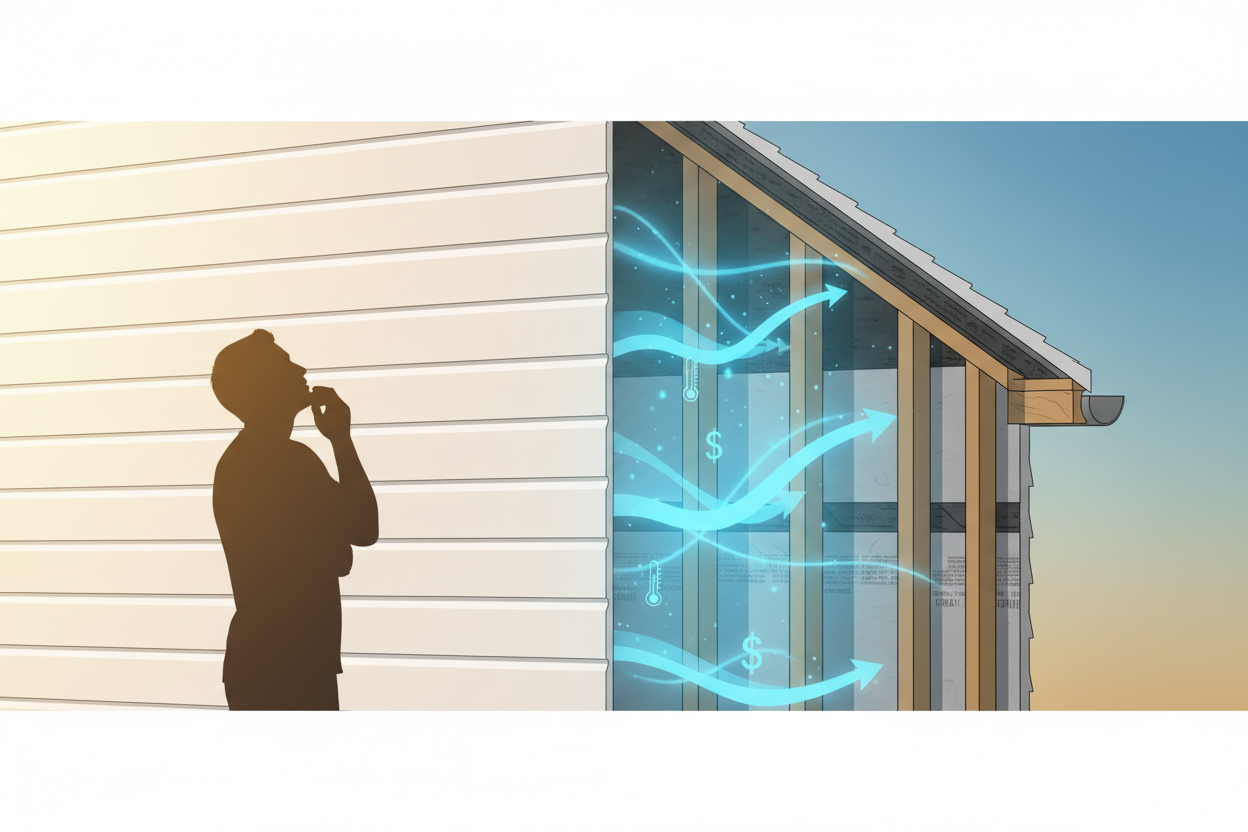
When you’re standing outside your home admiring that fresh vinyl siding installation, you might not realize there’s an invisible hero working behind the scenes. Your vinyl siding ventilation system is quietly protecting your investment, maintaining your home’s structural integrity, and keeping your energy bills in check. Yet surprisingly, many homeowners don’t fully understand how these systems work or why they’re absolutely crucial for their home’s health.
Think of your vinyl siding ventilation system as your home’s respiratory system. Just like you need to breathe, your house needs proper airflow to prevent moisture buildup, regulate temperature, and maintain a healthy living environment. Without adequate ventilation, you could face expensive problems down the road, from mold growth to premature siding failure.
In this comprehensive guide, we’ll walk you through everything you need to know about vinyl siding ventilation systems. Whether you’re planning a new siding installation, troubleshooting existing issues, or simply want to understand your home better, you’ll discover practical insights that can save you thousands of dollars in repairs.
Understanding Vinyl Siding Ventilation Basics
Vinyl siding ventilation isn’t just about moving air around – it’s about creating a balanced system that protects your home from moisture damage while maintaining optimal energy efficiency. The fundamental principle involves creating controlled airflow behind your siding panels, allowing moisture to escape while preventing unwanted elements from entering.
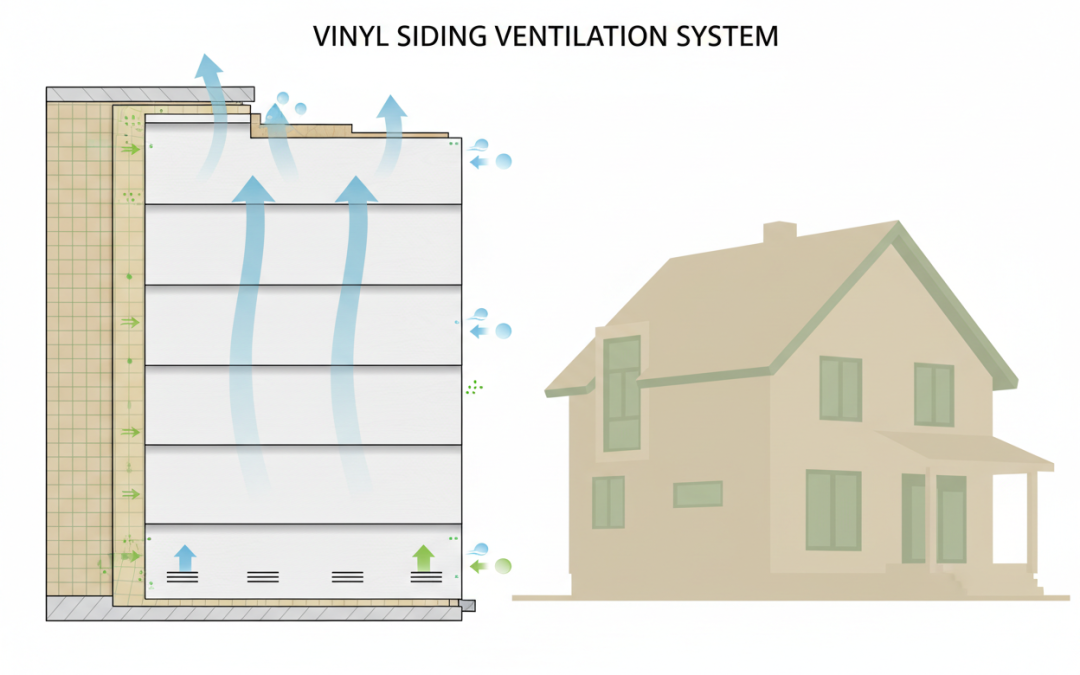
Your ventilation system works through a simple but effective process. Cool, dry air enters through intake vents at the bottom of your siding system, travels upward through the cavity between your siding and house wrap, and exits through exhaust vents near the top. This continuous airflow cycle removes moisture that could otherwise accumulate and cause serious damage.
The beauty of a well-designed vinyl siding ventilation system lies in its passive operation. Unlike mechanical systems that require electricity or moving parts, proper siding ventilation relies on natural convection and wind pressure to maintain airflow. This means lower maintenance requirements and no additional energy costs for operation.
Why Proper Ventilation Matters for Your Vinyl Siding
Moisture is vinyl siding’s biggest enemy, and without proper ventilation, you’re essentially inviting trouble into your walls. When warm, humid air gets trapped behind your siding, it creates the perfect breeding ground for mold, mildew, and rot. These problems don’t just affect your siding – they can compromise your home’s entire structure.
Temperature regulation represents another critical benefit of proper ventilation. During summer months, trapped air behind your siding can reach temperatures exceeding 150 degrees Fahrenheit. This extreme heat can cause your vinyl panels to warp, buckle, or fade prematurely. Adequate ventilation helps maintain more moderate temperatures, extending your siding’s lifespan significantly.
Energy efficiency also improves dramatically with proper siding ventilation. When air can circulate freely behind your siding, it reduces the thermal load on your home’s exterior walls. This means your HVAC system doesn’t have to work as hard to maintain comfortable indoor temperatures, resulting in lower energy bills year-round.
Types of Vinyl Siding Ventilation Systems
Soffit and ridge ventilation systems represent the most common approach for vinyl siding applications. This traditional method uses perforated soffit panels or continuous soffit strips to provide intake ventilation at the eaves, while ridge vents or gable vents handle exhaust duties. The system creates excellent airflow patterns that effectively remove moisture and heat.
Behind-the-siding ventilation systems offer a more specialized approach, particularly beneficial for homes with complex architectural features. These systems incorporate ventilation channels or furring strips that create dedicated airspace behind the siding panels. This method provides superior moisture management and works exceptionally well in humid climates or challenging installations.
Combination ventilation systems blend multiple approaches to address specific challenges. For instance, you might use soffit intake vents with specialized siding exhaust vents, or incorporate both ridge and gable ventilation for maximum airflow. The key is matching your ventilation strategy to your home’s unique characteristics and local climate conditions.
Essential Components of an Effective Ventilation System
Intake vents form the foundation of your ventilation system, typically installed in soffits or at the base of your siding system. These components must provide adequate free air area while preventing insects, debris, and moisture from entering. Quality intake vents feature fine mesh screens and weather-resistant construction that maintains performance for decades.
Exhaust vents complete the ventilation circuit, allowing heated air and moisture to escape from the top of your siding system. Ridge vents, gable vents, or specialized siding exhaust vents can serve this function. The key is ensuring your exhaust capacity matches or slightly exceeds your intake capacity to maintain proper airflow balance.
Vapor barriers and house wrap play crucial supporting roles in your ventilation system. These components prevent moisture infiltration while allowing water vapor to escape from your home’s interior. Proper installation of these materials ensures your ventilation system can function effectively without compromising your home’s weather protection.
Installation Best Practices and Techniques
Successful vinyl siding ventilation installation begins with careful planning and measurement. You’ll need to calculate the required ventilation area based on your home’s square footage, local climate conditions, and specific siding manufacturer recommendations. Most building codes require one square foot of ventilation area for every 150 square feet of attic space, but vinyl siding systems may have different requirements.
Proper spacing and placement of ventilation components ensures optimal performance. Intake vents should be positioned to capture prevailing winds while avoiding areas prone to snow or debris accumulation. Exhaust vents need strategic placement to maximize the stack effect – the natural tendency for warm air to rise and create circulation.
Sealing and weatherproofing around ventilation components requires meticulous attention to detail. Every penetration in your siding system represents a potential entry point for moisture, so use high-quality sealants and flashing materials. Follow manufacturer specifications exactly, as improper sealing can compromise both ventilation performance and weather protection.
Common Ventilation Problems and Solutions
Inadequate airflow ranks as the most frequent ventilation problem homeowners encounter. Symptoms include condensation on windows, musty odors, or visible moisture damage behind siding panels. Solutions typically involve adding more intake or exhaust vents, removing obstructions from existing vents, or upgrading to higher-capacity ventilation components.
Blocked or clogged vents can severely compromise system performance. Leaves, debris, insect nests, or paint overspray commonly obstruct ventilation openings. Regular inspection and cleaning of all vents prevents these issues, while installing quality vent screens helps minimize future blockages.
Unbalanced ventilation creates inefficient airflow patterns that reduce system effectiveness. This occurs when intake and exhaust capacities don’t match properly, or when vents are poorly positioned. Correcting balance issues may require adding vents, relocating existing components, or adjusting vent sizes to optimize airflow.
Maintenance and Long-term Care
Regular inspection of your vinyl siding ventilation system should become part of your home maintenance routine. Check all vents quarterly for obstructions, damage, or signs of wear. Look for any gaps in sealant around vent installations, and verify that screens remain intact and properly secured.
Cleaning ventilation components annually helps maintain optimal performance. Use a soft brush or compressed air to remove debris from vent openings, and wash screens with mild soap and water as needed. Avoid using harsh chemicals or high-pressure washing that could damage vent materials or compromise seals.
Seasonal adjustments may be necessary in some climates to optimize ventilation performance. For example, you might need to clear snow from intake vents during winter months, or adjust dampers on mechanical ventilation components based on seasonal weather patterns. Understanding your local climate helps you anticipate and address these needs proactively.
Frequently Asked Questions
How much ventilation does my vinyl siding system need?
The required ventilation area depends on your home’s size, climate, and siding manufacturer specifications. Generally, you’ll need about 1 square inch of net free area per square foot of siding coverage. However, consult local building codes and manufacturer guidelines for specific requirements in your area.
Can I install vinyl siding ventilation myself?
While some ventilation components can be DIY-friendly, proper installation requires understanding of building science principles and local codes. Complex installations or homes with challenging architectural features typically benefit from professional installation to ensure optimal performance and code compliance.
What happens if my vinyl siding doesn’t have proper ventilation?
Poor ventilation can lead to moisture accumulation, mold growth, premature siding failure, increased energy costs, and potential structural damage. These problems often develop gradually, making early detection and correction crucial for protecting your investment.
How often should I inspect my siding ventilation system?
Inspect your ventilation system quarterly for obvious issues like blocked vents or visible damage. Conduct more thorough annual inspections that include cleaning and checking seals around all ventilation components. Address any problems promptly to prevent minor issues from becoming major repairs.
Do different vinyl siding styles require different ventilation approaches?
Yes, various siding profiles and installation methods may require specific ventilation strategies. Board and batten, shake, or specialty siding profiles often need customized ventilation solutions. Always follow manufacturer recommendations for your specific siding product and installation method.
Investing in a proper vinyl siding ventilation system isn’t just about meeting building codes – it’s about protecting your home’s value and ensuring decades of trouble-free performance. With the right knowledge and attention to detail, your ventilation system will quietly work behind the scenes, keeping your home healthy, efficient, and beautiful for years to come. Remember, when it comes to home maintenance, an ounce of prevention through proper ventilation is worth a pound of cure in avoided repairs and replacements.

Window replacement near me in Preston Hollow Dallas Texas























Window replacement near me Lakewood Dallas Texas

Home window replacement near me North Richland Hills Texas


Replacement window companies Lakewood Dallas Texas




How much does it cost for vinyl replacement windows Paradise Texas

Home window replacement near me Little Elm Texas








Affordable home window replacement Crandall Texas

Home window replacement near me Lake Highlands Dallas Texas